Showing posts with label Paul Moyse. Show all posts

Monday, March 7, 2011

Photoshop Frustration!

I must admit, I'm still pretty leery of digital artwork. Up to this point, all of my artwork generated on the Mac has been of the hybrid sort: drawn and inked traditionally by hand, then scanned in and coloured up with Photoshop. Notice I said "coloured" as opposed to "painted". You see, I don't consider what I've achieved thus far to be digital paintings - at least not in the truest sense.

Here's a recent example which explains why not. This actually just started out as a test to see if I could create something using the Paths function on Photoshop. Frankly, I've never been able to figure out how to use that nefarious Pen tool, with it's Bezier Curves function. Being a right-brained kind of guy, I just couldn't make sense of those weird little handles. However, one of my students this year at Sheridan, Lawrence Lam, was kind enough to give me a basic tutorial on the different aspects of the Pen tool. I hadn't been practicing since then (about March), so it took a lot of messing around with it a couple days ago to figure it all out again. Fact is, it took me several hours to achieve what l did, so I'm going to have to work with this a lot more to get up to speed!


First of all, I needed some subject matter to practice on. Let's see now, what should I draw? Hmmm...hey, how about a CUTE GIRL! Fortunately, I'd been downloading pics of The Toronto Sun's daily "Sunshine Girl" for just such an occasion, so I had quite a collection to draw from. Though these pics are all relatively small, I wasn't in great need of visual clarity, as I am not attempting to achieve a perfect caricatured likeness of a specific girl. Anyway, I liked the sunny look of this cute blonde with her ponytails, plus the pose was appealing, so I went with her.
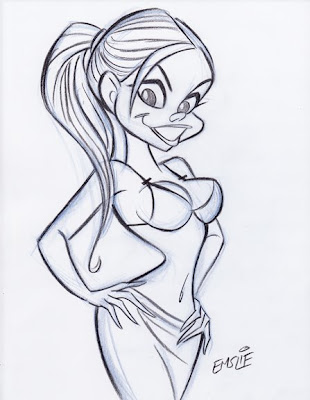

So here is my pencil sketch, starting out with a rough blue underdrawing, then defined on top with a dark pencil outline. (Are you paying attention, Sheridan students?) Like I said, I'm not trying to get a true likeness of this girl like I would with my celebrity caricatures - I'm just trying to capture her essence and using her pose and facial type as a starting point for what will be a much more cartooned interpretation. You can see how I've pushed the pose more, exaggerating the tilts and angles. For some reason, I have no idea why, I just gave her a single ponytail in the back instead of the two that the model has. Anyway, I only spent less than 20 minutes on the drawing, as it really was just for the purpose of this test with the Paths tool.
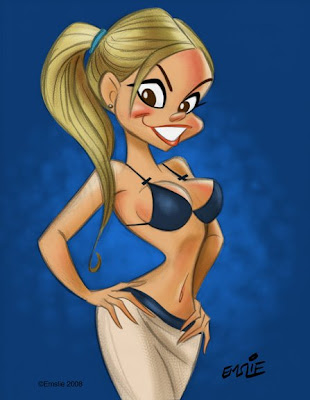

So after creating individual Paths for her flesh, hair, skirt, top, lips, eyes, etc. etc., I was finally ready to start adding colour. Initially I just filled each area with flat colours using the Paint Bucket tool, then started some fairly simple rendering in each area. I did want to try to get away from just using the Airbrush tool, so I used a custom brush that I learned how to make from an online tutorial that gave a more textured sort of rendering, similar to pastel. That, plus some softening here and there with the Airbrush seemed to result in a piece that was fairly appealing. I kept my pencil sketch on a transparent layer on top, lowering the opacity of the linework so it didn't overpower the colour. However, here's where I feel rather handicapped by my minimal knowledge of Photoshop and digital painting.


Here is the same artwork with the pencil sketch layer turned off so that just the colour is visible. As you can well see, it doesn't work like this, as it needs the pencil line to pull it all together. Ideally though, I would like to develop my Photoshop skills enough to attempt a real digital painting, using just tonal rendering to create the form, though perhaps using a bit of accent linework to strengthen it here and there. Recently, I've joined the National Caricaturist's Network (NCN), and have been studying the wonderful work of such talented folks as Joe Bluhm, Court Jones and Paul Moyse, just to mention a few. All of these guys are exceptional talents working with both digital and traditional media, but it's their digital work that I'm really trying to learn from. These guys are truly digital "painters" in the very real sense - something that I currently can only aspire to. If anyone can recommend any good sites for simple and clear Photoshop painting tutorials, please feel free to post them here in the comments section. Thanks!
Saturday, March 5, 2011

Digital Cheesecake!

For a long time now I've been trying to figure out this digital painting stuff with Photoshop and finally I seem to making some headway. I went through pretty much all of the Photoshop brushes, trying them out in various ways to see what I could do with them, but I find most of them rather unsatisfying. However I did stumble upon this one that, after lots of messing with, I found I could get some nice painterly results. I also had been studying the work of fellow caricaturists, Court Jones and Paul Moyse, both of whose abilities I admire greatly, in order to analyze how they're using the medium so well.

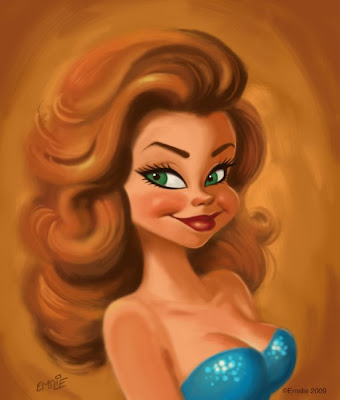
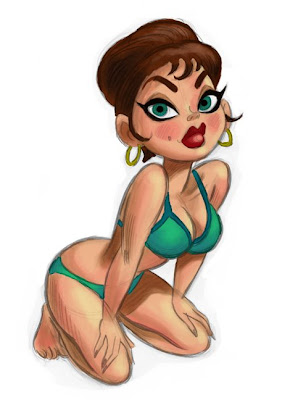
So then I decided to experiment and see what I could accomplish with this initial amount of Digital knowledge, as little as it was. I started out sketching this girl right on the screen using a brush I'd created from a tutorial that gives a nice soft pencil look. Then on a separate layer, I jumped in with both feet and started to paint it. I must confess that I got very frustrated along the way, nearly giving up a few times, but I persevered just to see what I could learn from the experience if nothing else. For this first attempt, I do wish I hadn't painted the background so close to the colour of her hair, though I do kind of like the way her hair melds into it at the back.

The more I worked with it, the more it started looking like a cartoonier version of the type of pin-up paintings I've always loved by Gil Elvgren, with a rich, creamy, oil paint feel to it. Since I didn't really know what I was doing most of the time, it took me hours longer to do than it really should have, but this was just a learning experience and hopefully I'll be able to accomplish things more quickly as I get more proficient with it.

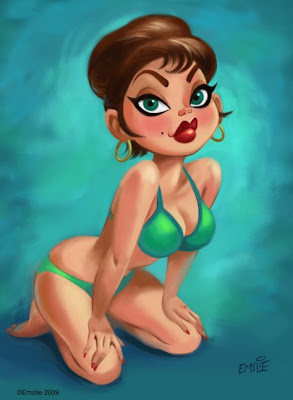
For this second attempt I used several vintage 50's pin-up photos as reference, combining elements from each and making stuff up as well. This time, however, I drew her in pencil on paper the way I normally do, then scanned in the sketch. After making it into a transparent layer in Photoshop, I painted in the main areas on a separate layer underneath, first in flat colours, then adding a bit of modeling based on the lighting in the reference photos. Above is the rough sketch with quick colour added. It's actually a fun and satisfying technique in itself, and warrants more exploration sometime.

Once I had a rough colour sketch I was happy with, I merged the two layers together and started into the "oil painting" technique on top. Though I was having an easier time of it since my first attempt, the difficulty with digital painting is knowing when to stop and leave an area alone. I tried to keep the whole thing progressing at the same rate, but it's always so tempting to start embellishing it with details too early in the process.

Seeing the finished artwork, I'm still not sure about some things. In my opinion, there could still be more tonal definition, as I feel that some areas look too soft, especially when compared back to the colour sketch. Doing narrow, smooth lines is not easy in Photoshop, and I therefore have a hard time with detail in the hair, as well as the eyelashes, and any areas where I've used a bit of soft darker outline to help accentuate some of the form. Here's where a good sable watercolour brush still beats the heck out of computer technology, in my opinion. (Yes, I remain a traditionalist at heart!)

Anyway, these are just a couple of initial attempts to learn the digital painting process. I keep on studying the work of artists I like in order to pick up additional skills, but I know it's a long road ahead of me.